


You've booked your chemical peel. Or maybe it's microneedling. Perhaps you're finally taking the plunge with laser resurfacing. Whatever professional treatment is on your calendar, here's something most people don't realize: the outcome of the treatment doesn't just depend on what happens in the treatment room; it also depends on what you do in the days and weeks leading up to it.
Think of it like this, you wouldn't run a marathon without training. Your skin needs conditioning, too, especially before it undergoes an intensive treatment designed to trigger regeneration. The difference between a treatment that delivers jaw-dropping results and one that leaves you red, irritated, and wondering what went wrong often comes down to preparation.
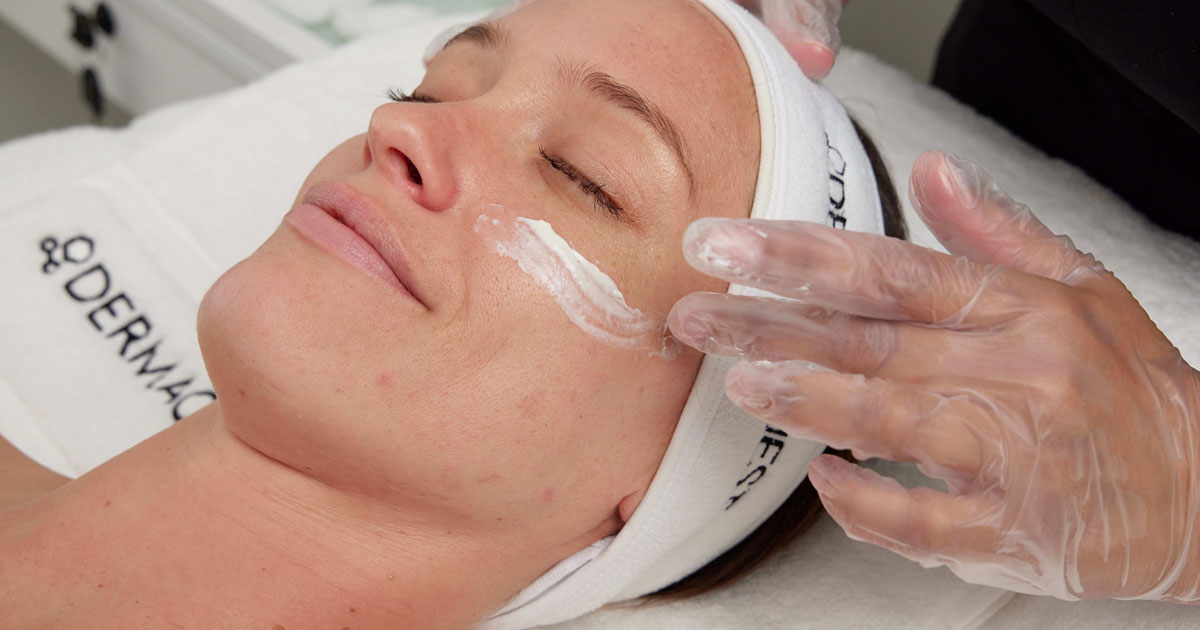
Proper pre-treatment skincare prepares your skin for success and helps you get the most out of your investment.
Key Takeaways
- Prep Impacts Results. Great outcomes start before treatment—healthy prep means smoother recovery and better results.
- Keep Skin Balanced. Hydrated, calm skin with a strong barrier responds best. Gentle, consistent care is key.
- Pause Potent Actives. Hold off on retinoids, vitamin C, and exfoliants unless your provider says otherwise.
- Follow Professional Guidance. Every treatment plan is unique—your provider’s prep instructions always come first.
- Partner with DermaQuest. Trusted by professionals, DermaQuest supports your skin’s health before treatment with targeted formulas that prep, protect, and prime for your best results.
Why Pre-Treatment Preparation Matters
When skin isn't properly prepared, barrier function can become compromised, making skin hypersensitive to the treatment intended to improve it. Instead of responding predictably and healing efficiently, unprepared skin can overreact, leading to prolonged redness, increased inflammation, extended downtime, and in some cases, results that fall short of expectations.
In some cases, poor preparation can even lead your provider to postpone your treatment entirely—nobody wants that after clearing your calendar and preparing for the appointment.
Conversely, properly prepared skin is like a well-primed canvas. Hydrated, healthy skin with an intact barrier responds more predictably to professional interventions. You'll likely experience less irritation, faster healing, and better overall results.
The Pre-Treatment Timeline: What to Do When
4-6 Weeks Before (For Pigmentation Concerns)
If you're dealing with hyperpigmentation or uneven tone一especially if you have darker skin一proper preparation begins weeks in advance. Your provider may recommend starting a preconditioning regimen that includes tyrosinase inhibitors to prepare your skin and minimize the risk of post-inflammatory hyperpigmentation.
This is where DermaQuest's MelaQuest Cysteamine Serum can come into play. As the brand's most concentrated pigmentation treatment, it combines cysteamine with 13 tyrosinase inhibitors, including ascorbic acid and botanical extracts, to suppress the enzymes that lead to hyperpigmentation. Starting this serum weeks before your treatment一under your provider's guidance一can help condition your skin for better, more even results, particularly for medium to deep skin tones.
3-5 Days Before: The Active Ingredient Pause
Time to press pause on your heavy-hitters: retinoids, vitamin C serums, AHAs, BHAs, and benzoyl peroxide all need to take a backseat. These ingredients increase cellular turnover and can thin your stratum corneum (the outermost layer of your skin), making it more vulnerable during treatment.
Discontinue exfoliating tools and harsh scrubs.
Important exception: Always follow your provider's specific protocol. Some may recommend continuing certain products right up until treatment day, so it’s best to trust their expertise and understanding of your individual skin and treatment plan.
48 Hours Before: Simplify Everything
Your routine should now be pared down to the basics: gentle cleansing, intensive hydration, and barrier support. Look for non-foaming, sulfate-free cleansers that won't disrupt your skin's natural pH balance. Layer hydrating serums with ingredients like hyaluronic acid, glycerin, and peptides. Add barrier-supporting moisturizers rich in ceramides, niacinamide, and fatty acids to your routine.
Also on the "absolutely not" list: sun exposure, tanning beds, facial waxing, threading, or any other aesthetic treatments. Skip alcohol-based toners and astringents. And increase your water intake一systemic hydration matters just as much as topical.
Day of Treatment: Arrive Fresh-Faced
Unless your provider specifies otherwise, arrive with clean, product-free skin. That means no morning skincare routine, no makeup, no sunscreen. Your provider needs to work on a blank canvas, and any products you've applied can interfere with treatment penetration or cause unexpected reactions.
What NOT to Do
Some of the most common mistakes that seem minor but can significantly impact your results include:
Avoid Last-Minute Changes or Overdoing It
It might sound obvious, but now isn’t the time to experiment. Even something as small as a new serum a few days before your peel can throw your skin off balance. Your skin will thank you for keeping things simple, steady, and gentle.
Resist the Urge to Exfoliate More Than Usual
More isn’t better here. Over-exfoliating weakens your barrier, which is the opposite of what you want to achieve going into treatment.
Don't Ignore Sun Exposure Guidelines
Be mindful of your time in the sun. UV damage can make your skin more reactive and slow down recovery, even from everyday exposure.
Don't Skip Your Provider's Instructions
And finally, follow your provider’s instructions closely. Their protocol is designed specifically for your skin and treatment plan, based on data and experience. When they tell you to pause your retinol, it’s not over-cautious—it’s setting you up for the best results.
Questions to Ask Your Provider
Even if you’ve had treatments before, don’t hesitate to double-check your prep. Every skin type and treatment can have its own unique protocol, and a quick check-in ensures you’re set up for the best possible results. Consider asking your provider the following questions before your appointment:
- Which specific products should I avoid, and for how long?
- Are there any products you recommend I use during the prep phase?
- Should I discontinue any medications or supplements?
- What should I do if I experience unusual sensitivity before my appointment?
- What can I realistically expect immediately after treatment?
A good provider will share written pre-treatment instructions, so you don’t have to rely on remembering every detail from a conversation. If something is unclear, call and ask. Providers want your treatment to succeed just as much as you do. There's no such thing as a stupid question when it comes to preparing your skin for a professional procedure.
The Bottom Line
Professional skincare treatments are investments in your appearance, confidence, and skin health. Proper preparation protects that investment. It's not about being high-maintenance; it's about understanding that great results require a partnership between you and your provider, and that partnership begins days before you sit in the treatment chair.
Your skin is about to go through something intensive and transformative. Give it the preparation it needs to handle that transformation effectively and beautifully.
Ready to Achieve Your Best Treatment Results?
Proper preparation starts with professional guidance. Locate a licensed DermaQuest skincare professional near you who can create a customized pre-treatment protocol for your specific skin needs and treatment goals.
Find Your DermaQuest Skincare Professional
Frequently Asked Questions
- What causes skin barrier damage?
Over-exfoliation, harsh cleansers containing sulfates, environmental stressors (e.g., pollution, extreme weather), hot water, layering too many actives, and certain medications can all compromise your skin barrier.
- What ingredients should I avoid while my barrier heals?
It’s always best to consult a skincare professional for personalized advice on barrier restoration. However, pausing all actives, such as retinol, AHAs, BHAs, vitamin C, and benzoyl peroxide, can help.
Also, avoid alcohol, fragrance, essential oils, and sulfates.
- What ingredients should I use during barrier repair?
Consult a skincare professional before introducing any new products. That said, ingredients such as ceramides, niacinamide, peptides, hyaluronic acid, and squalane, when used as directed, can help support barrier restoration and hydration.
- How long does skin barrier repair take?
Results vary by individual, but typical timelines are as follows:
- Mild damage: 2-4 weeks
- Moderate damage: 4-6 weeks
- Severe damage: 2-3 months
- What's the difference between dehydrated skin and barrier damage?
Dehydrated skin lacks water and responds quickly to hydrating products. Barrier damage involves structural compromise, causing persistent sensitivity, stinging, and dryness that standard moisturizers can't fix.
- Can I wear makeup during barrier repair?
It's always best to consult a skincare professional; however, gentle, fragrance-free formulations are generally suitable. Remove with a non-foaming cleanser, and include makeup-free days when possible to support recovery.


